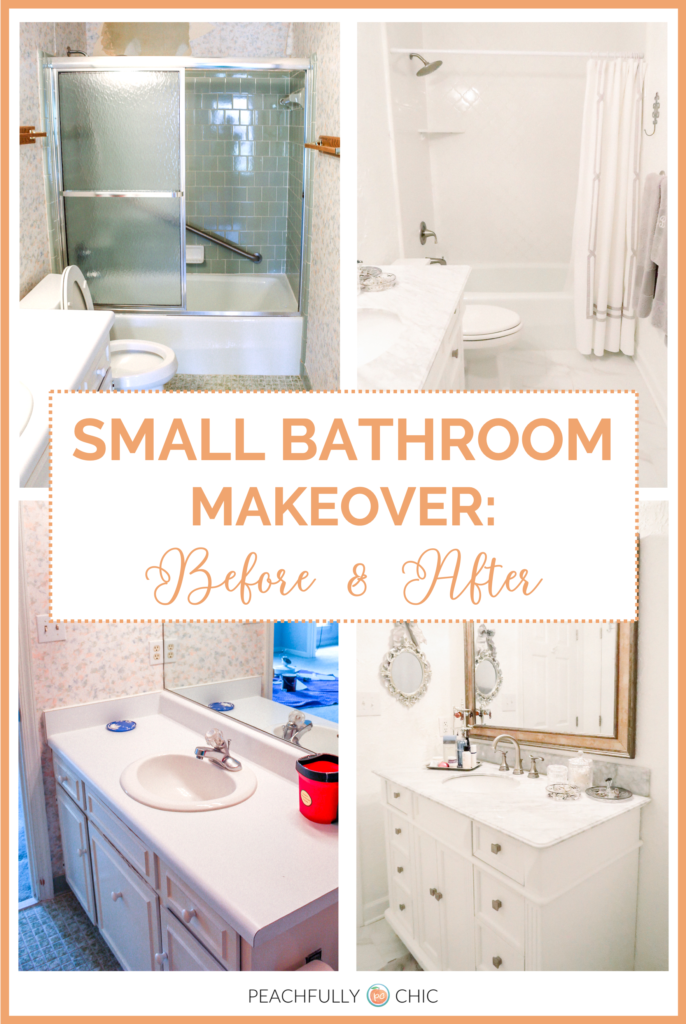
For better or worse, there are always certain traits or interests that you can attribute back to your parents. For some people, that may be a love of music, a signature laugh, or a fondness for the outdoors. One thing for me, it’s the empowering idea that you can build anything with a creative outlook and a little hardwork. So it was no surprise when my mom decided to downsize into a smaller more manageable home, she purchased a townhouse that needed a good bit of TLC across the board to make it what she wanted.
One of her first projects was a bright white bathroom makeover and I’m sharing details below with before and after photos of this incredible transformation. It took a lot of hard work and some help from a few professionals, but the end result was a beautiful bathroom makeover.


Removing Wallpaper
To start, she removed the hideous wallpaper which proved to be a much larger challenge than anyone anticipated. After failed attempts on our own, we hired a “professional” to handle it. Unfortunately, it proved to be a little too much for him as well since he ended up removing more chunks of sheetrock than we did 🙁
We are pretty sure it was the original wallpaper from when the townhouse was built back in the 1970’s. We finished removing the wallpaper on our own and hoped this rough start was not setting the tone for the rest of the bathroom makeover.
Insider’s Tip: While most modern wallpaper is much easier to use than older styles, be prepared that not all wallpaper is removable with the same amount of ease.
Goodbye Green Tile
The next step was to remove all the outdated green tile on the floor and in the shower. We busted it up with a hammer and chisel over the course of the next few days. Harder than chiseling the tile up was actually removing it from the bathroom. We scooped all the tile fragments into 10-gallon buckets to carry downstairs. The buckets ended up being much heavier than we thought and almost impossible to lift.
While we were in the process of removing the tile, we picked out and placed an order for the new tile from the Georgia family-owned Traditions in Tile. They have 9 Showrooms, including the one we visited in Augusta, plus a distribution center for the Southeast located in Alpharetta, GA.
Insider’s Tip: Broken tile can get heavy very quickly, so when removing tile from a bathroom, make more frequent trips with much smaller bucketloads to keep the weight manageable.
So Long Sink & Friends
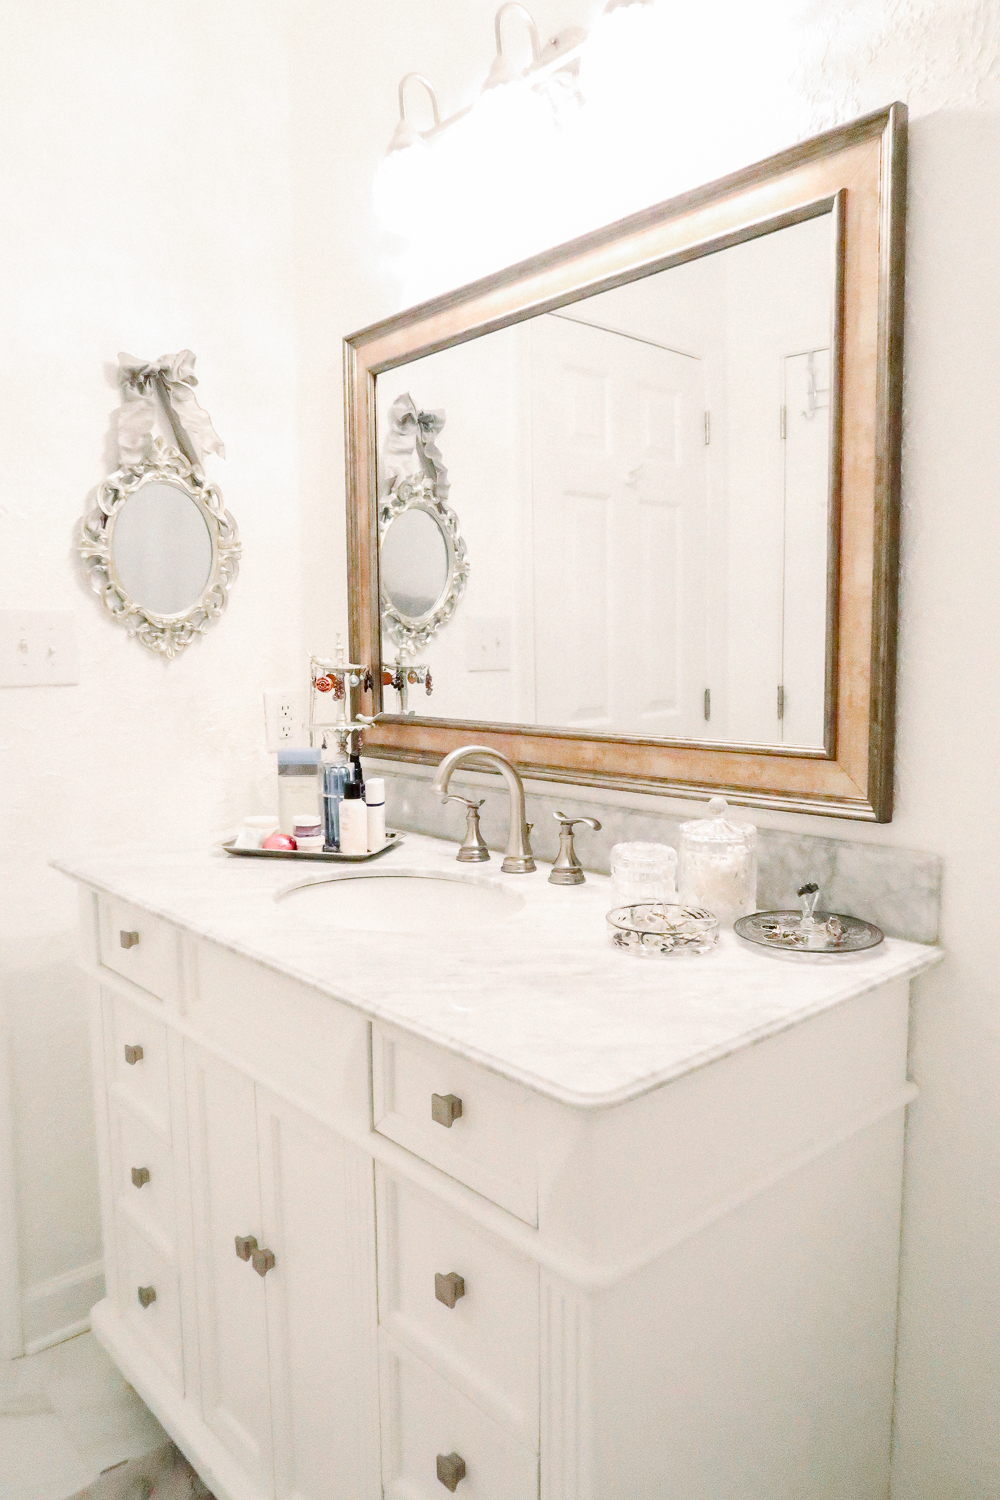
We removed the sink, cabinet, mirror & Hollywood bulb lights next. My mom really didn’t plan to keep very much from the original bathroom – if anything at all. The Hollywood lights made the room very hot, the basic plain mirror had a very “general contractor” feel, and the sink and cabinet weren’t really on trend any longer.
Clean & Fresh
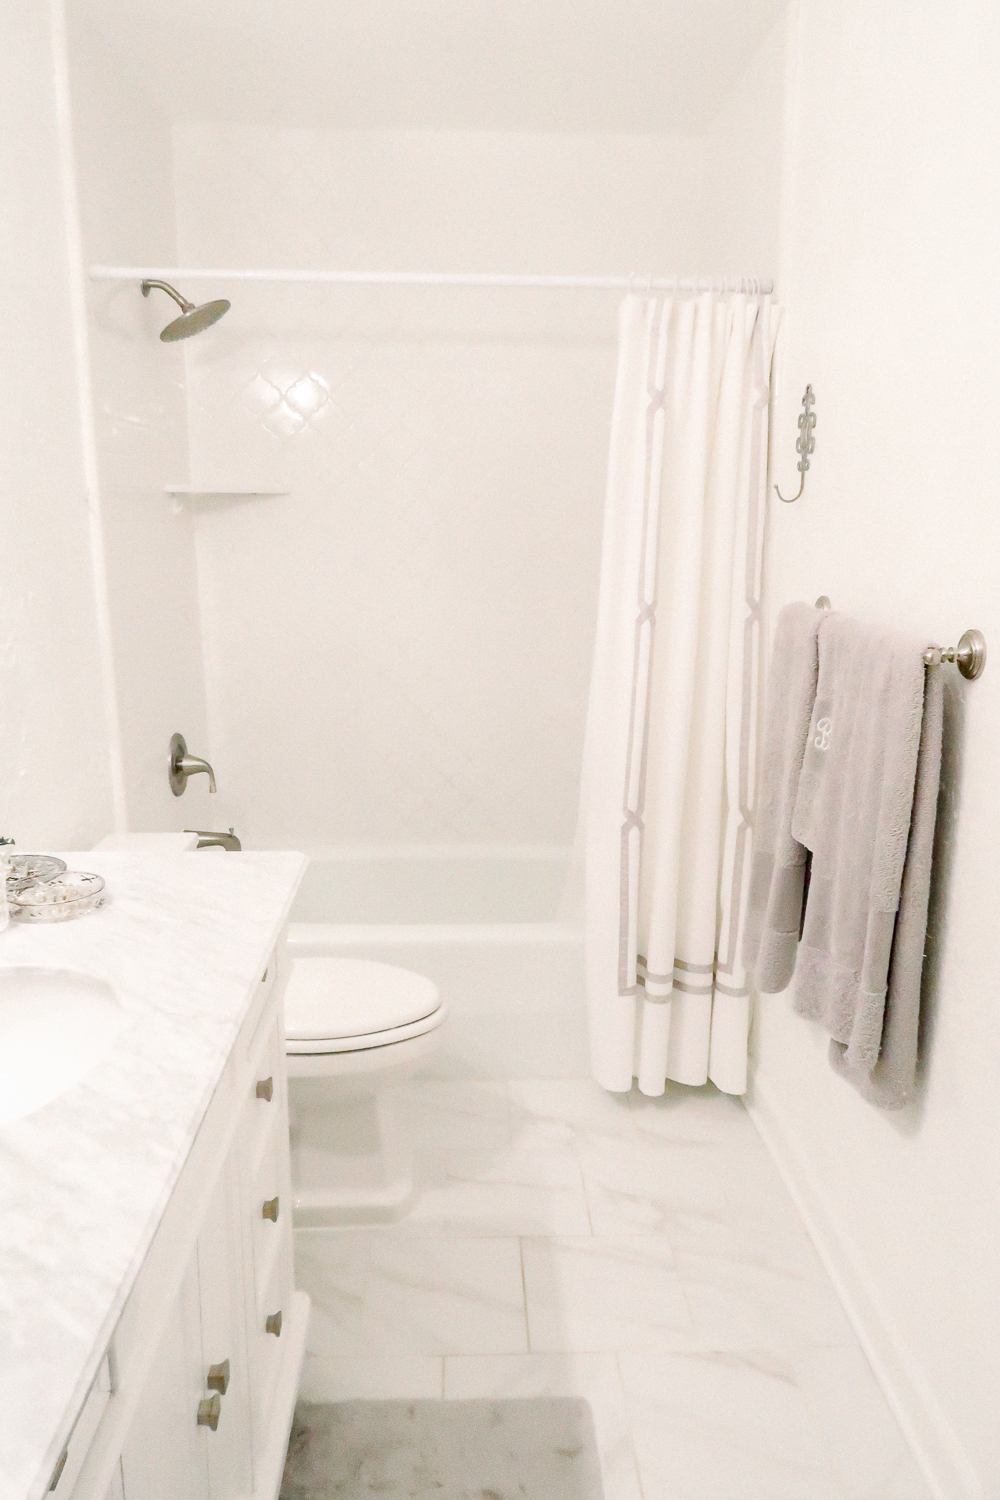
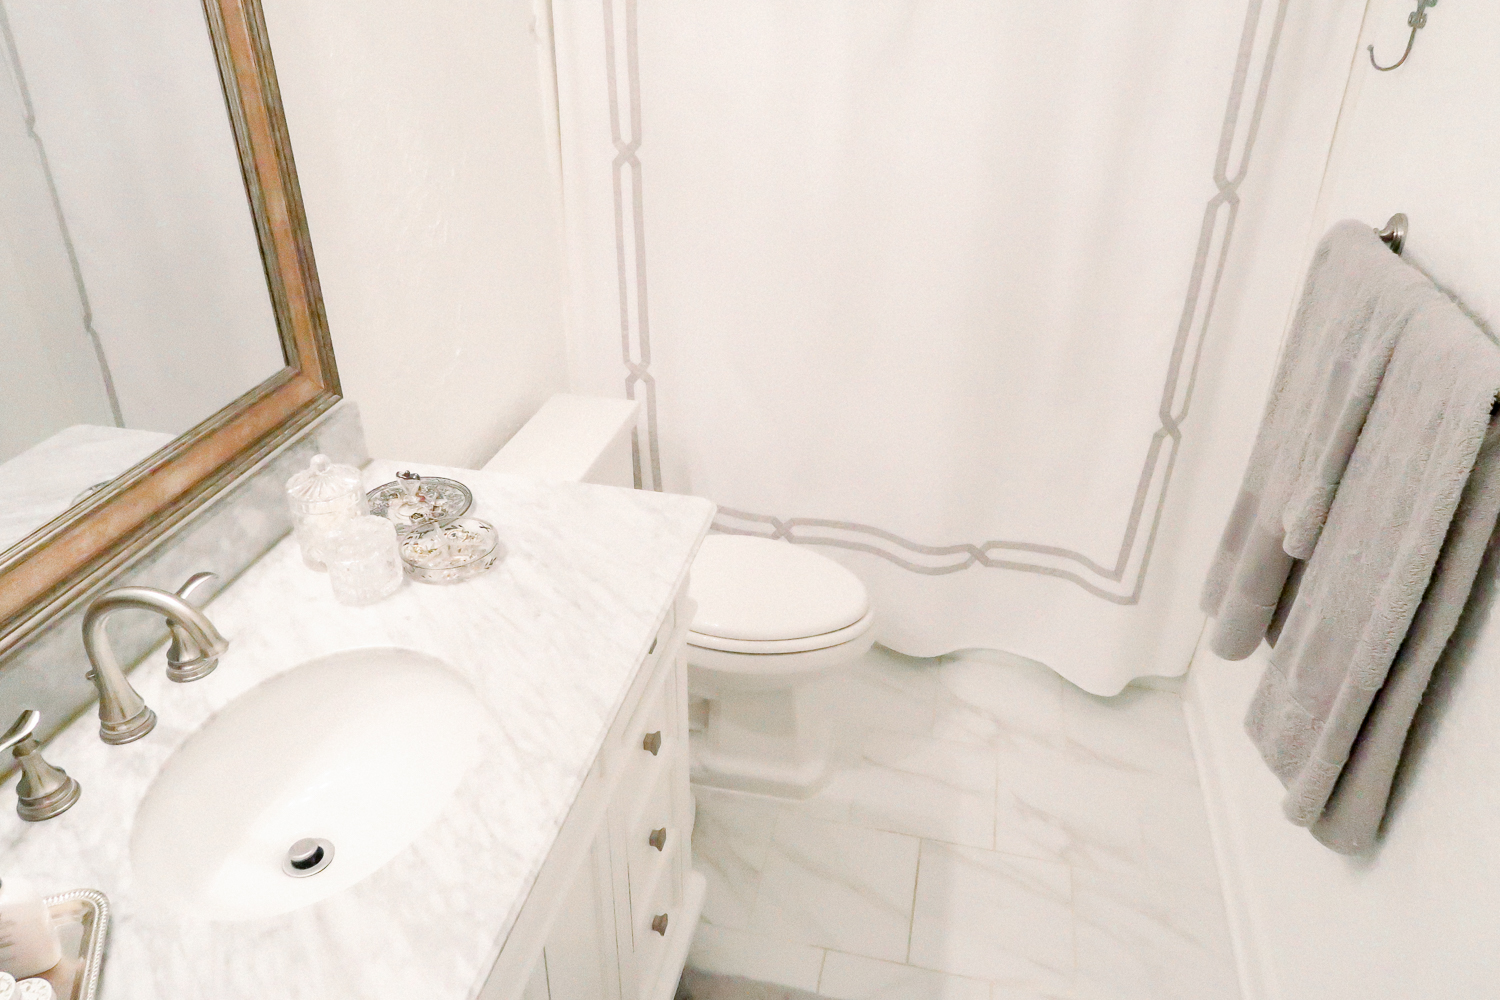
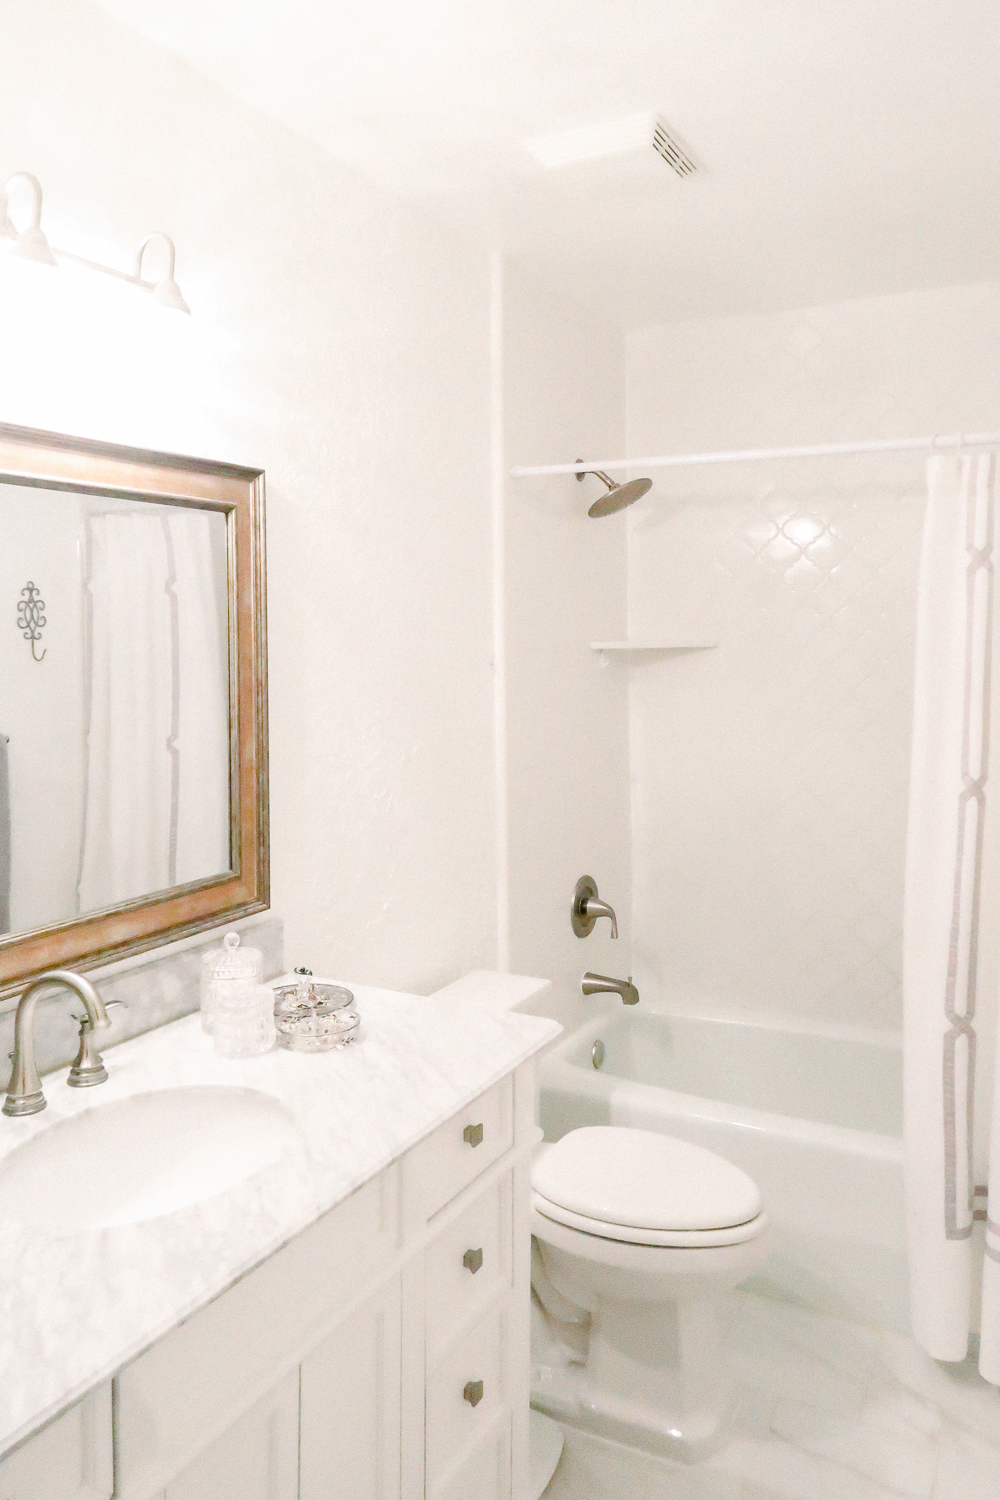
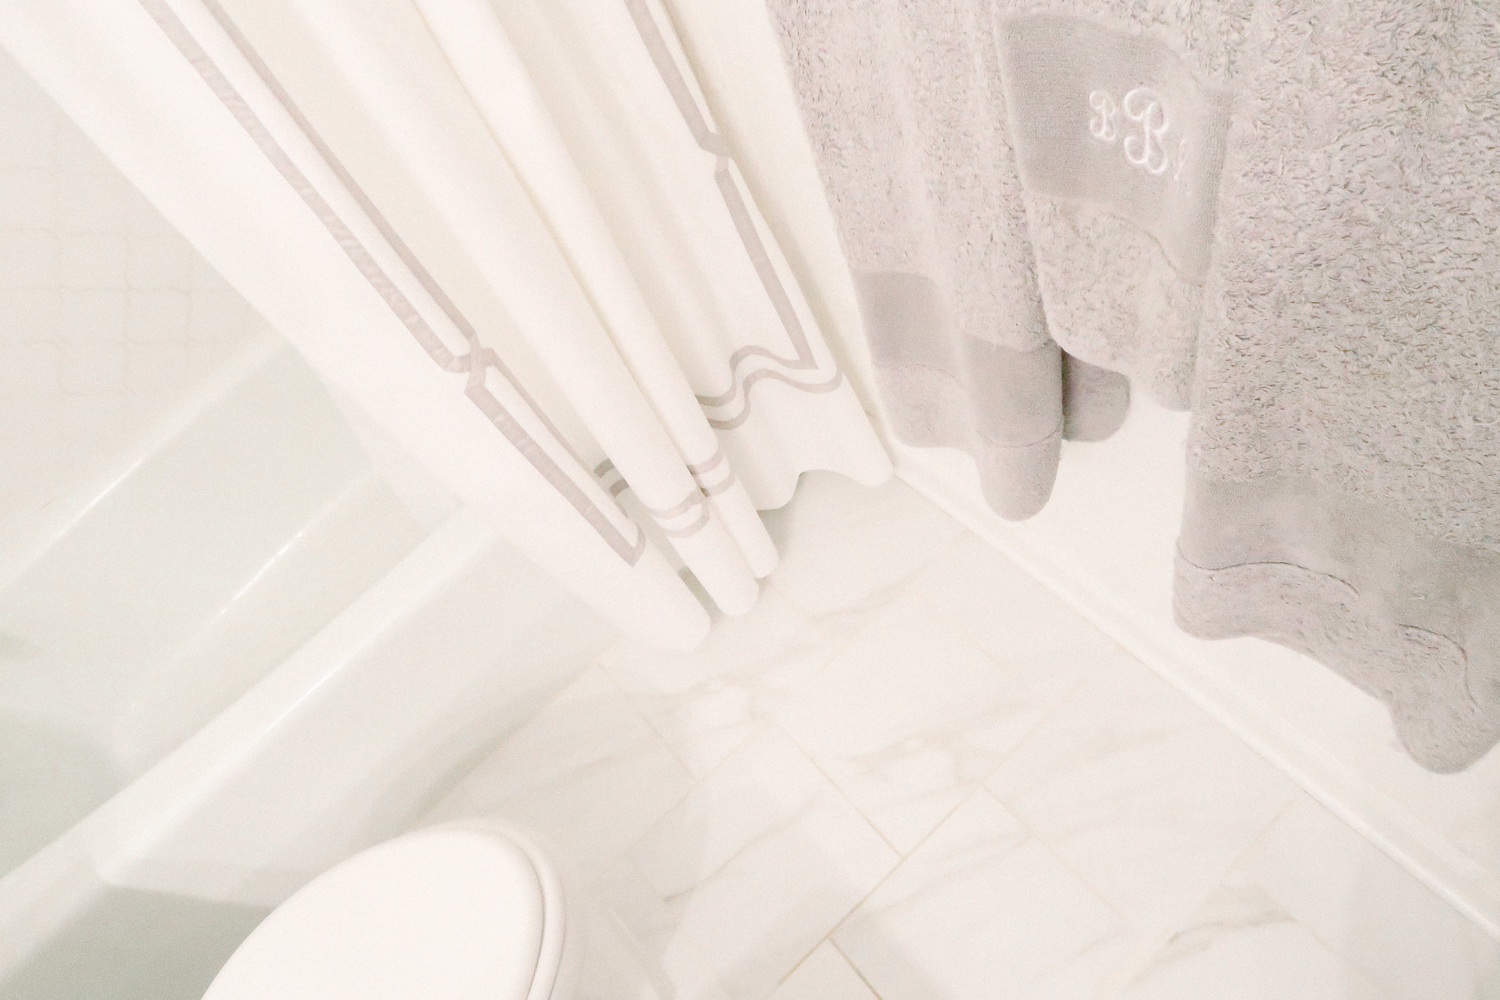
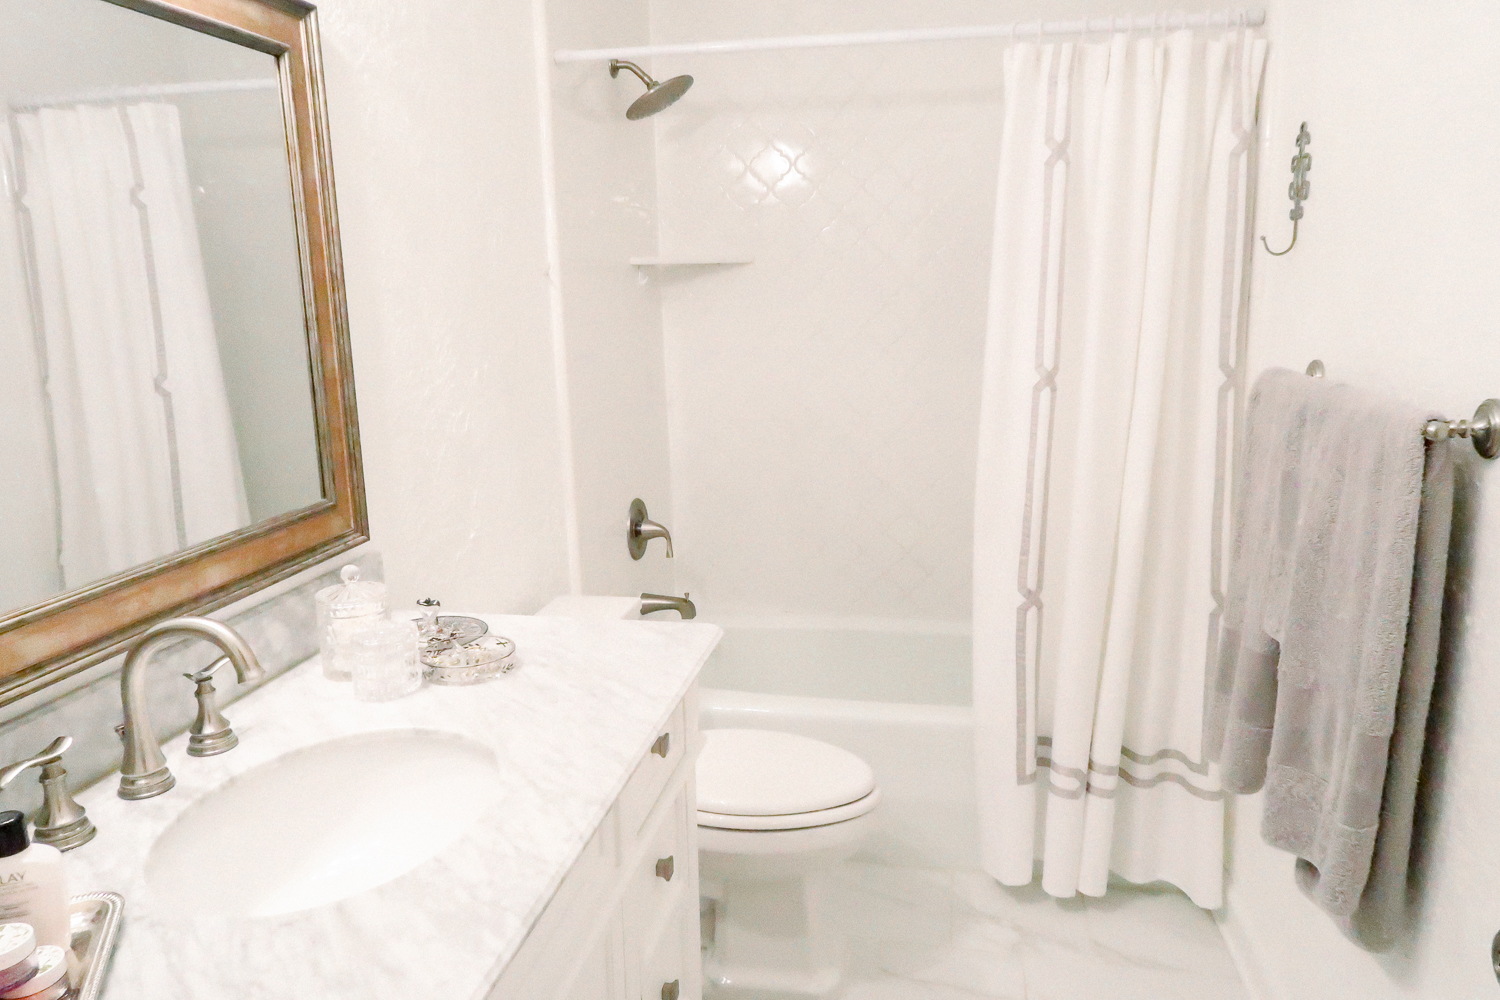
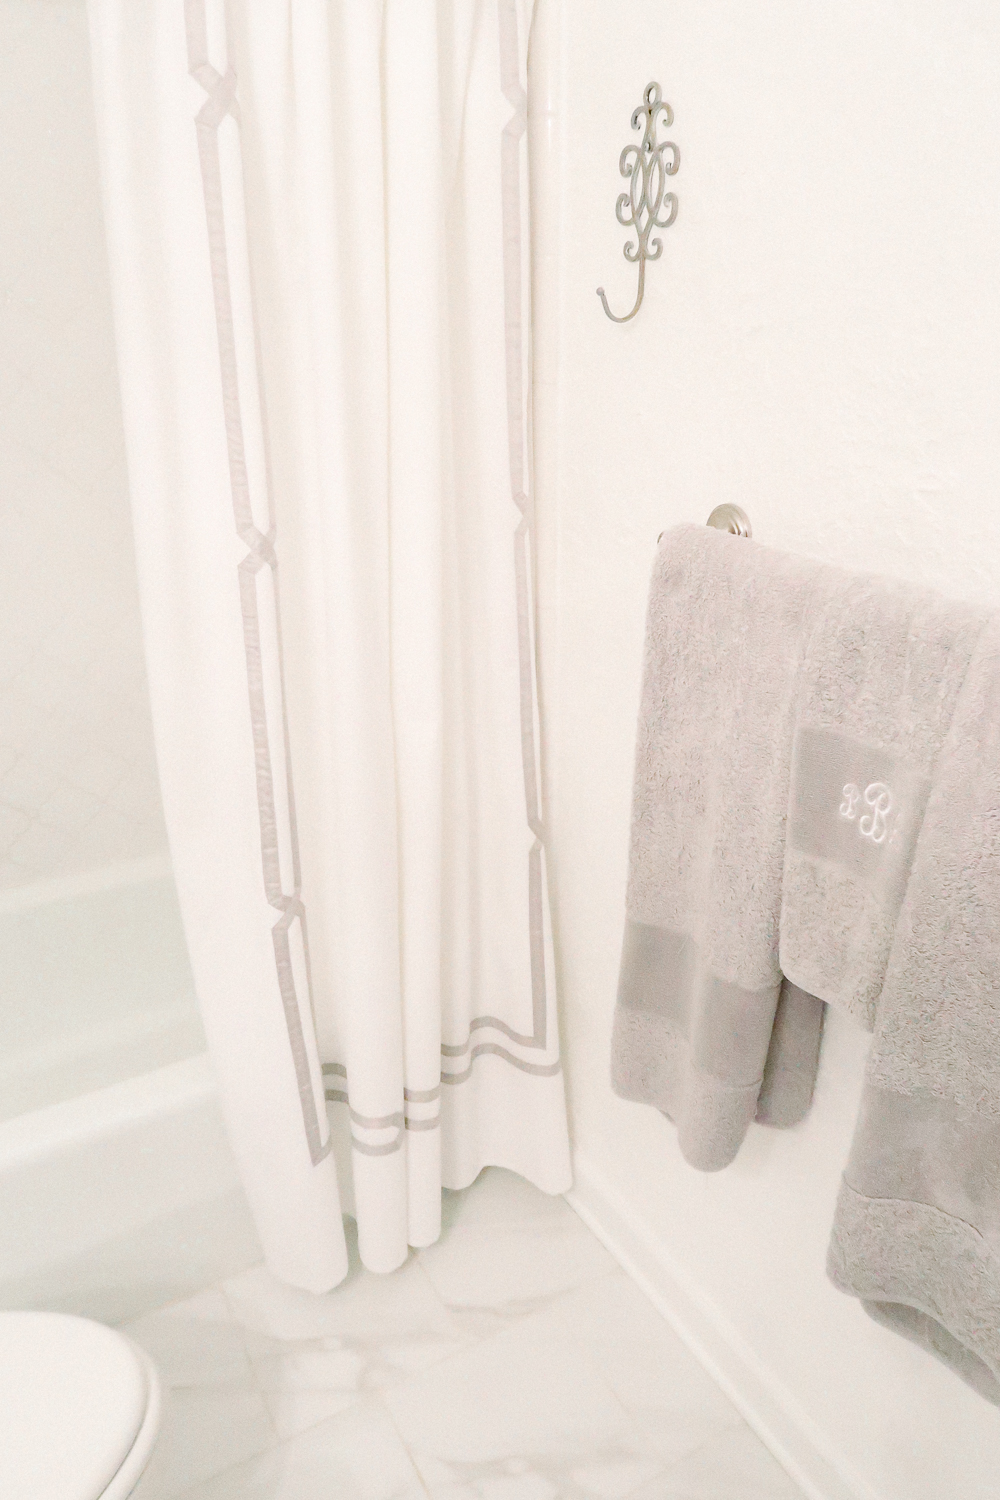
The next step was cleaning up all the dust and remaining debris. We swept up most of it but used a shopvac to ensure we got everything. We ordered the new bath vanity with sink from another local business just across the Savannah River in North Augusta, SC called Carolina Designer Cabinets. We kept the tub because it was white (which matched the new color palette) and it was in pretty good shape. While the cabinet was on its way, we hired someone to install the new white tile around the tub for the shower. We loved a decorative Morracan lantern-shaped white tile that was a little pricey for our makeover budget, so we opted to use that on the back main wall and subway tile for the sides. We knew the lantern-shaped tile would make a great focal point when the shower curtain was pulled back. We also had the guy install our polished Carrera porcelain tile flooring.
After all the tile work was completed and everything was set in place, we hired a plumber to set the sink, install the new sink faucet and toilet, and add new handles and faucet in the shower. Because the walls were pretty jacked-up from the wallpaper removal process, we decided to add texture to blend in the blemishes by applying plaster of paris with the whisk of a broom. Then we painted the walls with a pearlized white that gave the room a fresh clean look and feel with just a bit of sheen.


Shop the Story:
With any type of home improvement project, there are bound to be learning moments, delays, and potentially big speed bumps, but this bright small bathroom makeover was well worth the elbow grease put into it. We didn’t need to remodel the layout to give this small bathroom a great new look that not only maintained great function but also looked fabulous, fresh and clean.
I wish I had step-by-step photos of each stage of the makeover, but hopefully these before and after photos will provide some inspiration as you tackle your next DIY project or small bathroom makeover!

What a beautiful transformation! Loving the neutral and gray with glam accents.